
In this blog post we look into Cloud Build service from Google, which is great and cheaper CI/CD tool compared to the more known Travis CI, circleci or CodeShip cloud services.
It has a simple build configuration (cloudbuild.yaml) with many open-source build steps. It comes with 120 free build-minutes per day and up to 10 concurrent builds included.
Cloud Build with Jib
Our example is a simple spring boot application which can be found here. We are using the Jib Maven plugin to dockerize this application. If you are interested in more details about this checkout my previous blog post
Since with Jib is very easy to create a docker image our initial build step could be the following
- name: gcr.io/cloud-builders/mvn:3.5.0-jdk-8
  id: build
  args: ['clean', 'install', 'jib:build', '-Dimage=eu.gcr.io/${PROJECT_ID}/${_IMAGE_NAME}']
The build is executed as the root user with /builder/home set as home folder, with working directory set to /workspace. This is where our code is checked out.
This /workspace directory is persisted between the builds steps.
With the .gcloudignore we can configure which files to ignore in order to save bandwidth when uploading the source code.
In our example only 6.6 KB was upload:
Creating temporary tarball archive of 10 file(s) totalling 6.6 KiB before compression.
Uploading tarball of [.] to [gs://learning-cloud-build-251912_cloudbuild/source/1567805425.2-45e7381b7d114a6b9f7edda290d769c4.tgz]
Caching Maven dependencies
Is not fun to download the Maven dependencies for each build, so what we could do is to package up the dependencies after the build has finished and store it on a bucket.
- name: gcr.io/cloud-builders/gsutil
  waitFor:
  - build
  dir: /root
  entrypoint: bash
  args:
  - -c
  - |
    tar -czf /tmp/m2-cache.tar.gz .m2 &&
    gsutil cp /tmp/m2-cache.tar.gz gs://${_GCS_CACHE_BUCKET}/m2-cache.tar.gz
  volumes:
  - name: m2
    path: /root/.m2/
With the volumes section we declare a Docker volume that is mounted into build steps to persist files between build steps.
The waitFor helps to run build steps in parallel. In this case when the build step with id build has finished we can start in parallel uploading the Maven dependencies to GCS and starting the deployment to GKE.
And of course before a new build starts again we need to unpack the dependencies from the bucket.
- name: gcr.io/cloud-builders/gsutil
  dir: /root
  entrypoint: bash
  args:
  - -c
  - |
    (
      gsutil cp gs://${_GCS_CACHE_BUCKET}/m2-cache.tar.gz /tmp/m2-cache.tar.gz &&
      tar -xzf /tmp/m2-cache.tar.gz
    ) || echo 'Cache not found'
  volumes:
  - name: m2
    path: /root/.m2/
Start a new build
We can trigger the build manually using the gcloud CLI:
$ gcloud builds submit
The following command expects a cloudbuild.yaml file in the current directory. We can specify another configuration using the --config <config-file> argument.
Triggers
We can set a build trigger to re-build the image on any changes to the source repository. In the Cloud Console under Cloud Build -> Triggers is easy to set it up.
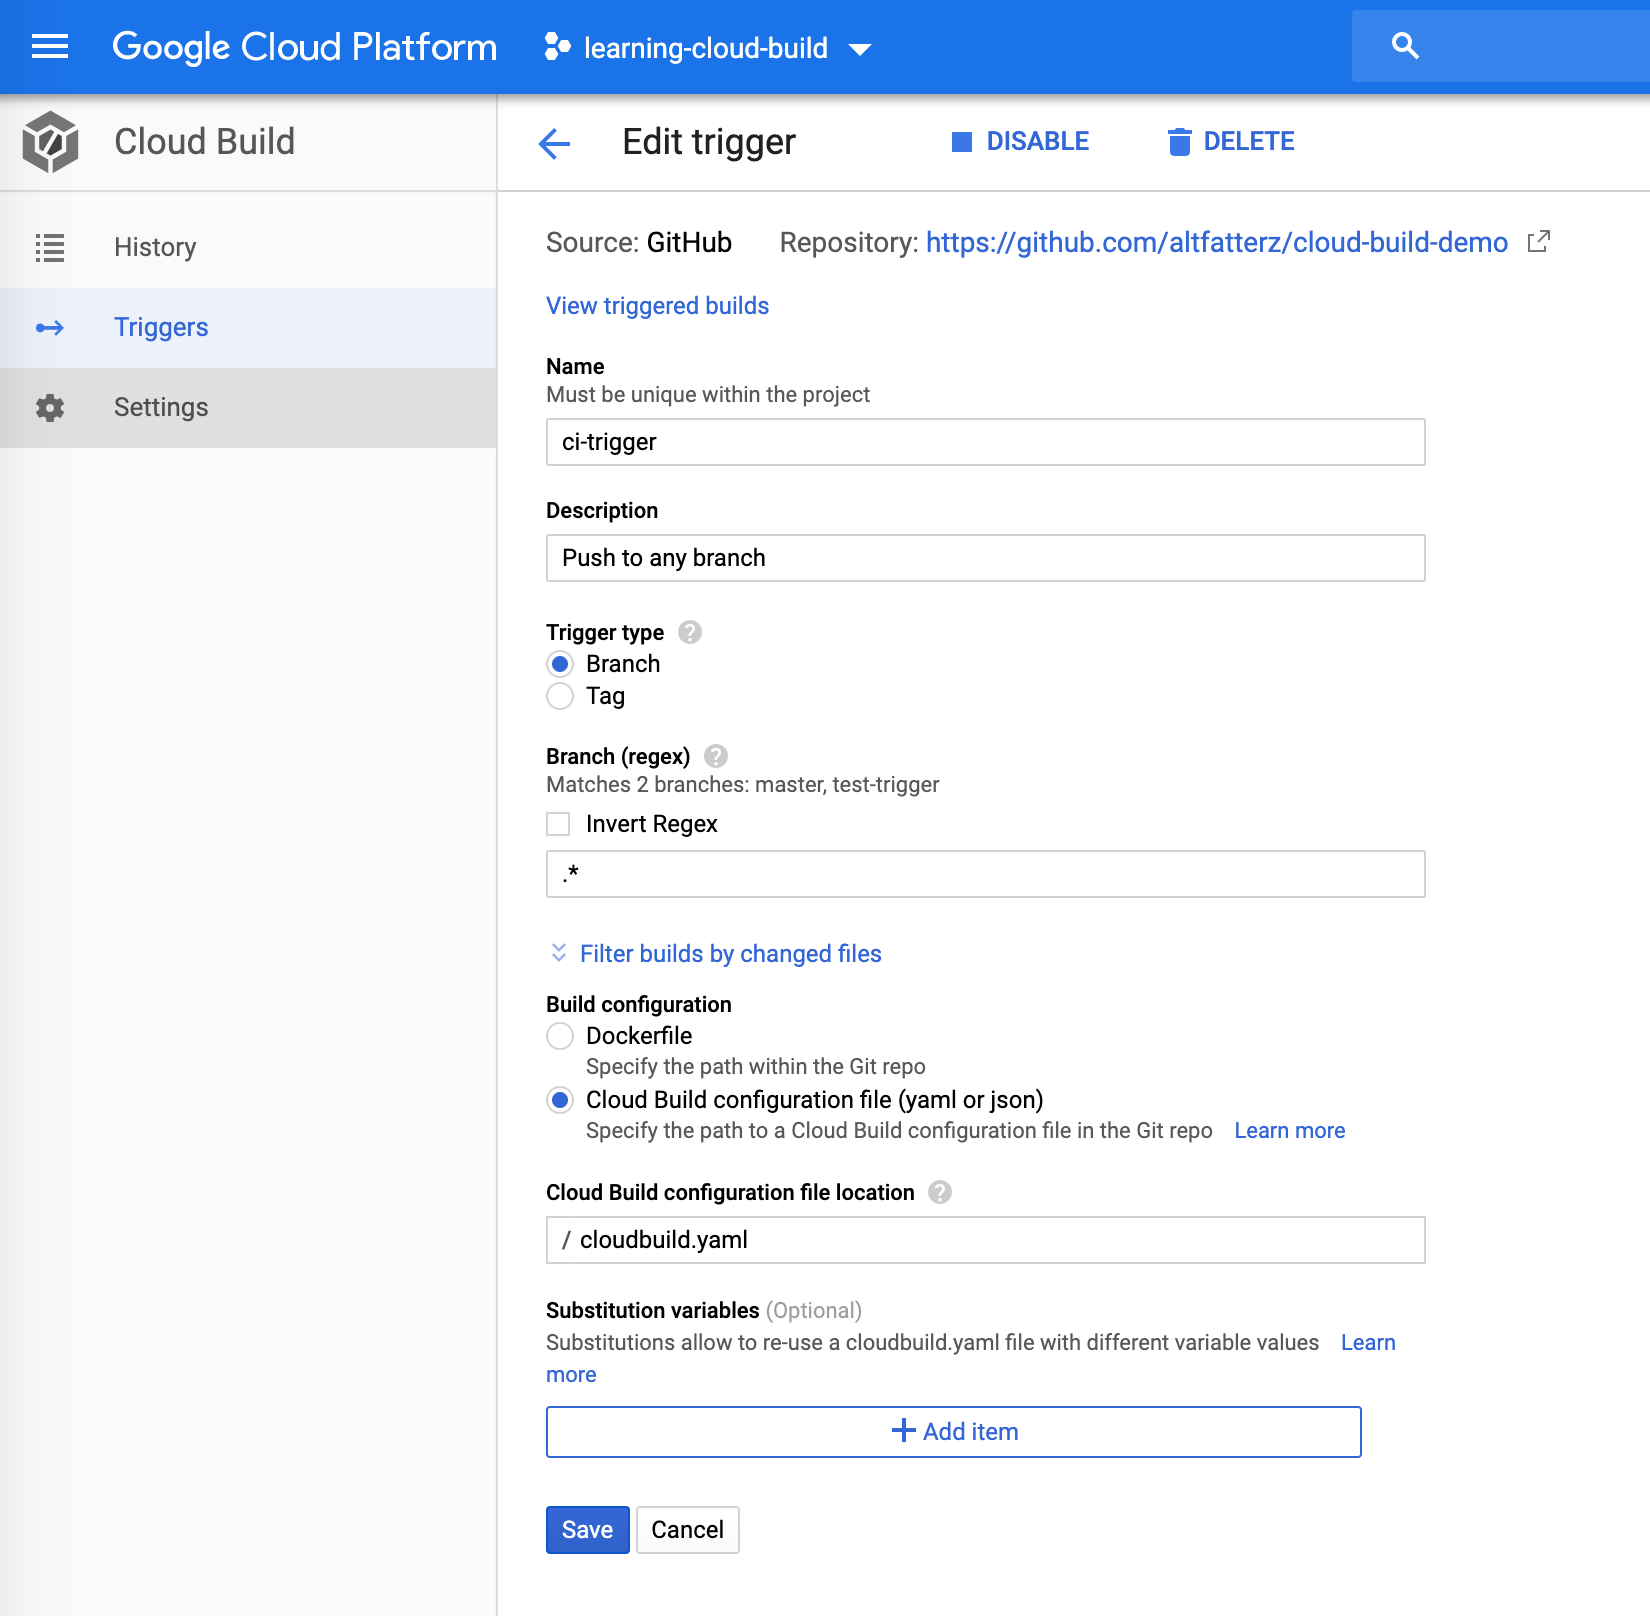
This trigger configuration makes sure whenever we push to any branch the build is triggered. Sometimes is handy to skip the trigger, like when we update documentation. In this case using [skip ci] or [ci skip] in the commit message makes sure that the build will be skipped.
Deploying
Cloud Build provides good support for deploying the artifact on various targets like GKE, App Engine, Cloud function, Cloud Run
Here we are going to look into how to deploy it to a GKE cluster.
First we enable the GKE API
$ gcloud services enable container.googleapis.com
Then we create a cluster:
gcloud container clusters create cloud-build-demo \
    --zone europe-west6-a \
    --machine-type g1-small
After waiting couple of minutes our cluster is up and running
$ gcloud container clusters list

NAME              LOCATION        MASTER_VERSION  MASTER_IP      MACHINE_TYPE  NODE_VERSION   NUM_NODES  STATUS
cloud-build-demo  europe-west6-a  1.12.8-gke.10   34.65.239.226  g1-small      1.12.8-gke.10  3          RUNNING
To deploy to GKE we call the gke-deploy builds step which is a wrapper around kubectl apply deployment
- name: 'gcr.io/cloud-builders/gke-deploy:stable'
  args:
  - run
  - --image=eu.gcr.io/${PROJECT_ID}/${_IMAGE_NAME}:latest
  - --location=europe-west6-a
  - --cluster=cloud-build-demo
  - --expose=8080
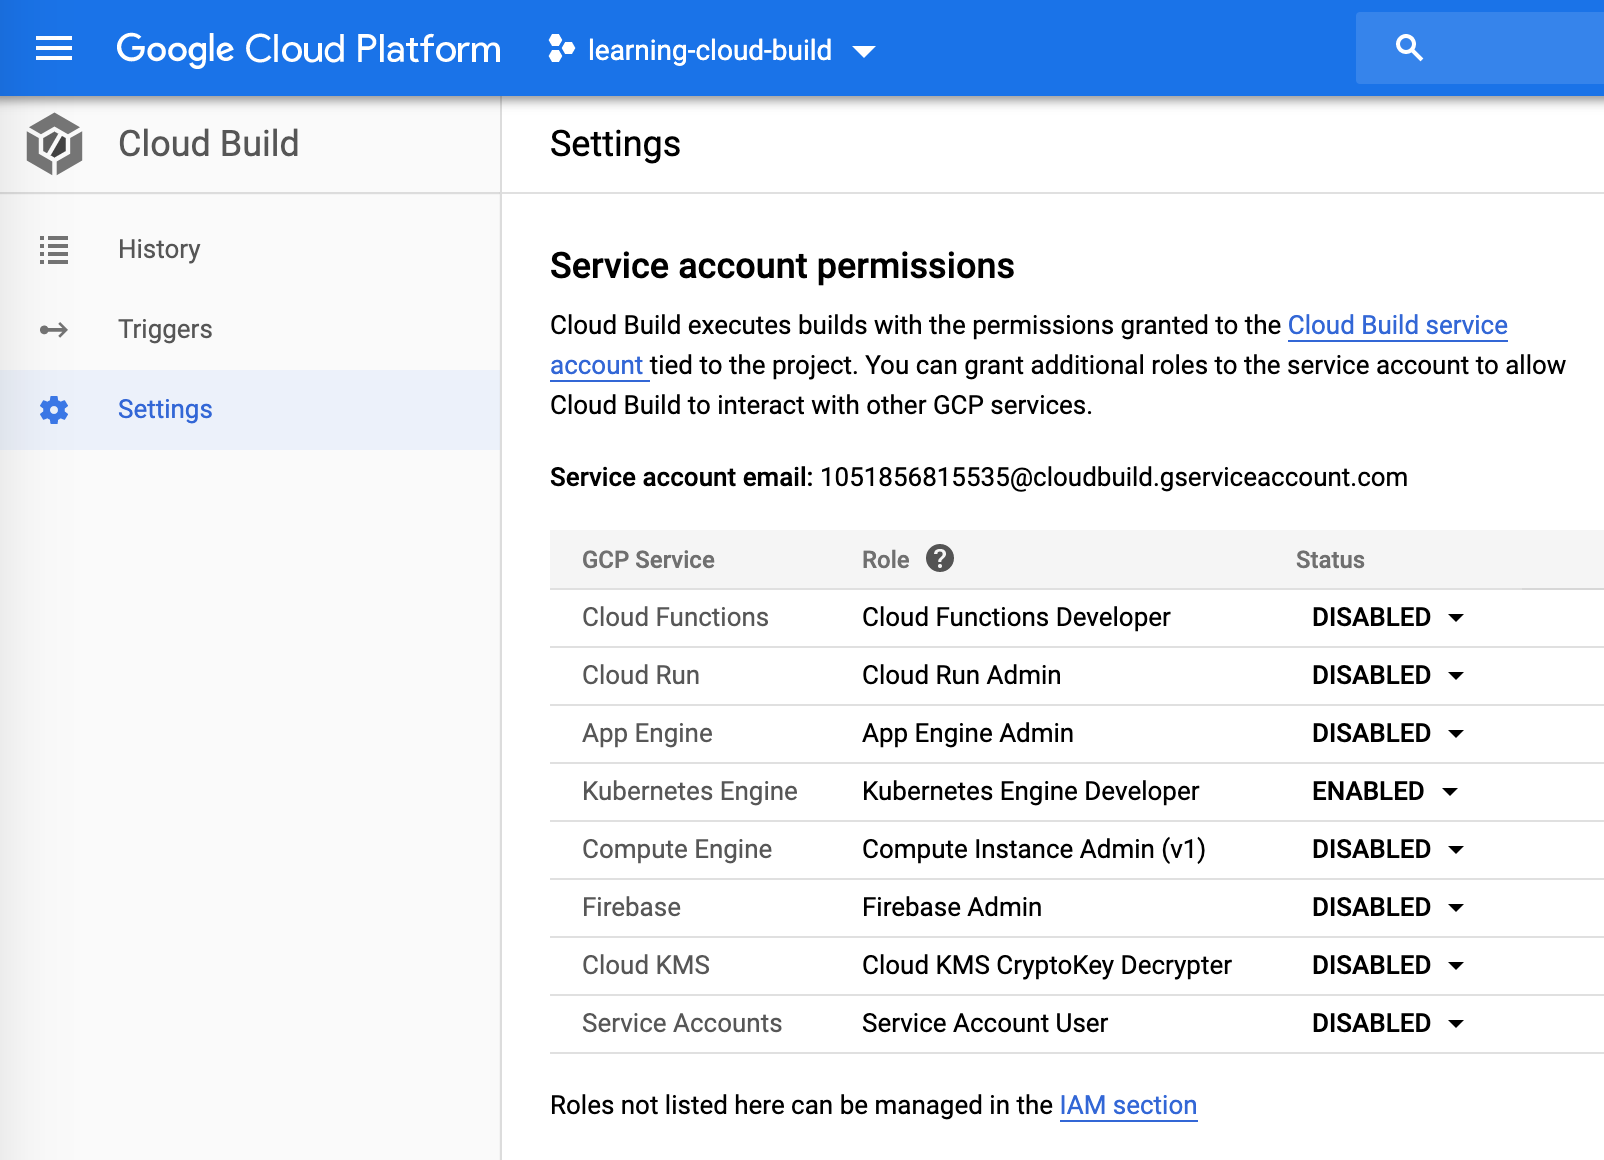
Next we need to add the Kubernetes Engine Developer role to the service account used by Cloud Build service.
The gke-deploy step generated a deployment configuration:
Step #3: ################################################################################
Step #3: > Deployed Objects
Step #3:
Step #3: KIND                       NAME                        READY
Step #3: Deployment                 cloud-build-demo            Yes
Step #3: HorizontalPodAutoscaler    cloud-build-demo-hpa        Yes
Step #3: Service                    cloud-build-demo-service    Yes      34.65.110.195
Step #3:
Step #3: ################################################################################
$ http 34.65.110.195:8080
HTTP/1.1 200
Content-Length: 26
Content-Type: text/plain;charset=UTF-8
Date: Fri, 06 Sep 2019 11:45:14 GMT

Google Cloud Build rocks!!
Notification
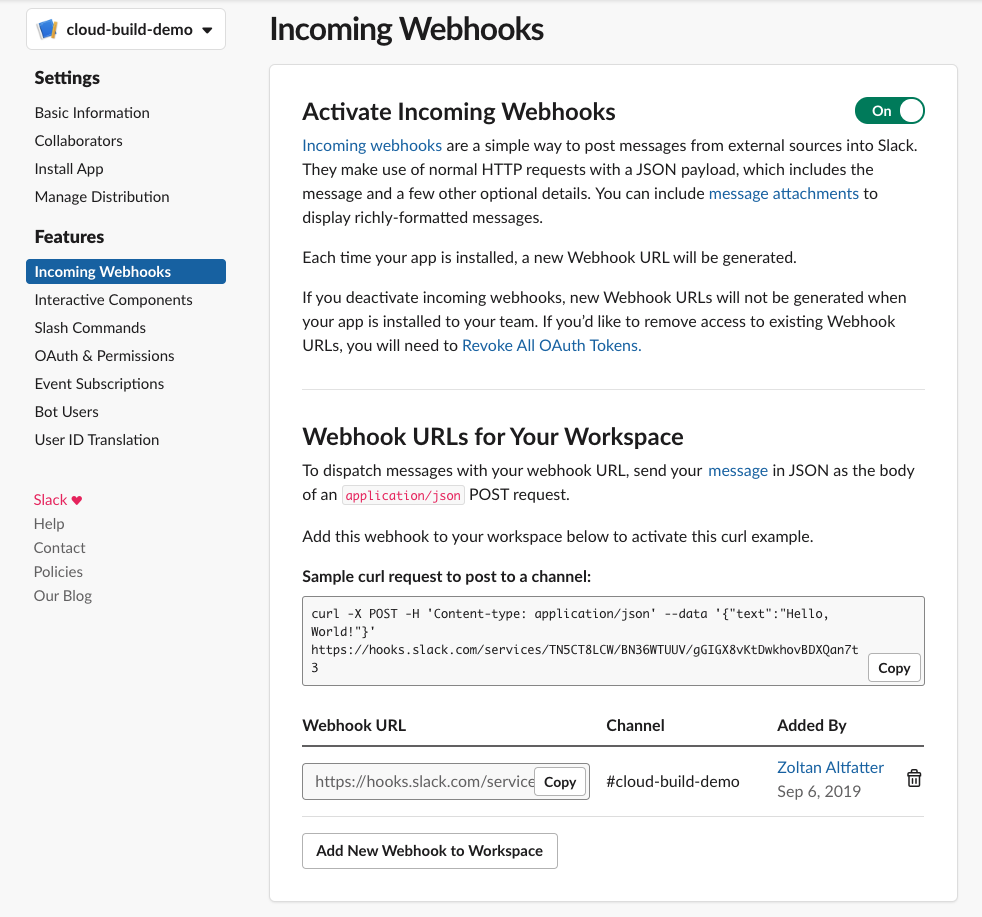
Instead of waiting for the build, is better to be notified when the deployment was done. For this a Slack channel is very common and is super easy to set it up with Incoming WebHooks
Using the following the build step
- name: gcr.io/cloud-builders/curl
  args:
  - -X
  - POST
  - -H
  - 'Content-type: application/json'
  - --data
  - '{"text":"New deployment done! --> http://34.65.110.195:8080/"}'
  - https://hooks.slack.com/services/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
we get a notification when the deployment was done.

The complete cloudconfig.yaml can be found here: https://github.com/altfatterz/cloud-build-demo/blob/master/cloudbuild.yaml